Positioning Shapes in A-Frame
Introduction
In this activity you will learn about the different shapes that you can add to your A-Frame scene.
You will also learn how to add text to a scene and how relative positioning works.
Shapes in A-Frame
There are several shapes that can be added to an A-Frame scene with specific HTML tags. Each of these shapes have position, rotation and scale properties. There are also some other properties (such as color) which are available on all of the shapes as well.
Each of the shape tags have different properties, which affect their size and appearance. You may have noticed the different properties on the different shapes in the Hello WebVR scene. Some examples of the shapes in A-Frame and their properties (in italics) are:
- box: this draws a box (a rectangular prism) with a given width, height and depth
- sphere: this draws a sphere with a given radius (and you can also adjust the sphere to draw only segments - like a Pacman shape - with the phi-start, phi-length, theta-start and theta-length properties)
- ring: this draws a ring (a circle with a hole in the middle), for a given radius-inner for the radius of the inner hole of the ring and radius-outer for the radius of the outer edge of the ring
- cone: this draws a cone with a given radius-bottom for the radius of the bottom of the cone, a given radius-top for the radius of the top of the cone and a given height
You can use each of these shapes within an A-Frame scene by using a tag that begins with a- (for example, the <a-ring> tag for a ring shape and the <a-cone> tag for a cone shape).
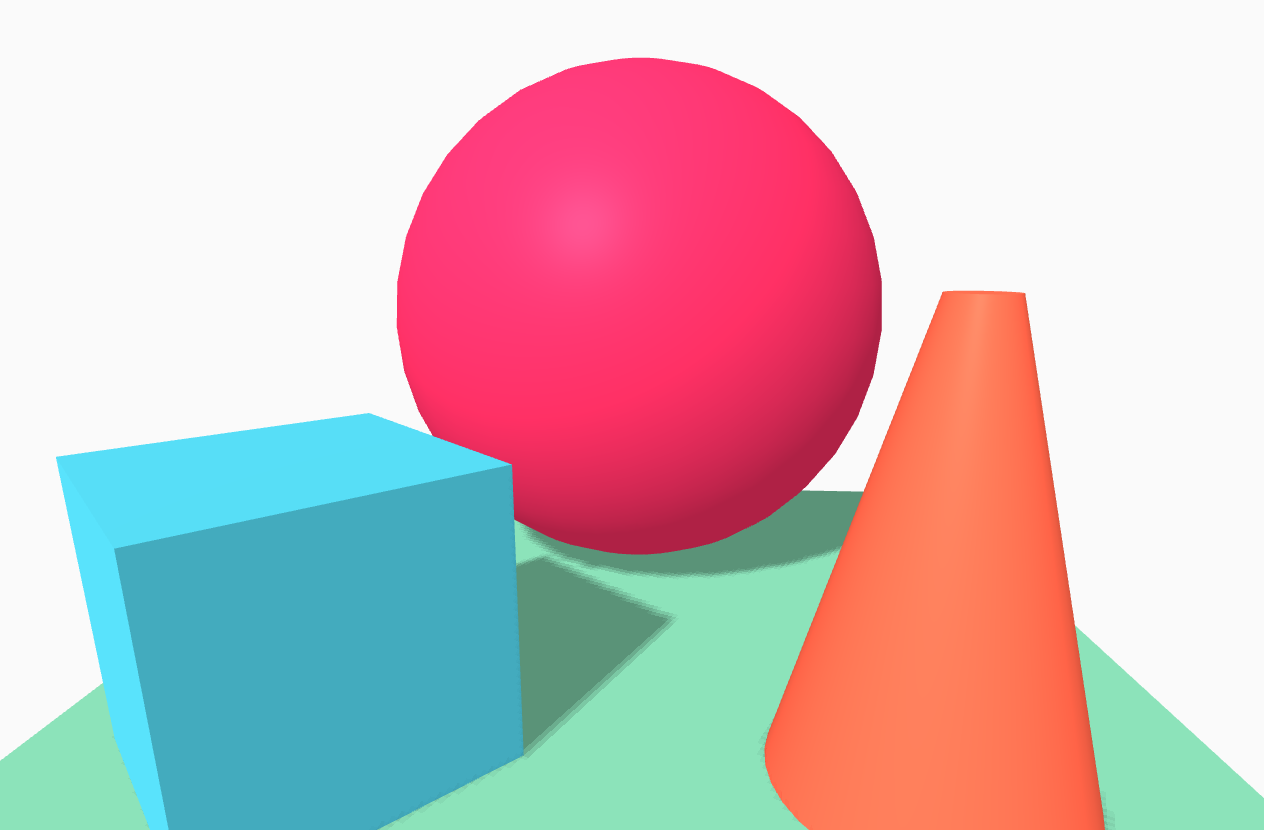
The code below would adds a cone shape with a radius of 0.5 on the bottom, a radius of 0.1 on the to and height of 1.5 to a scene.
<a-cone position="1 0.75 -3" color="tomato" radius-bottom="0.5" height="1.5" radius-top="0.1" shadow></a-cone>
A screenshot of the cone, in place of the cylinder in the Hello WebVR scene is shown in the below image:
You can read more about the different shapes that you can use in A-Frame on the Geometry Component’s Documentation Page.
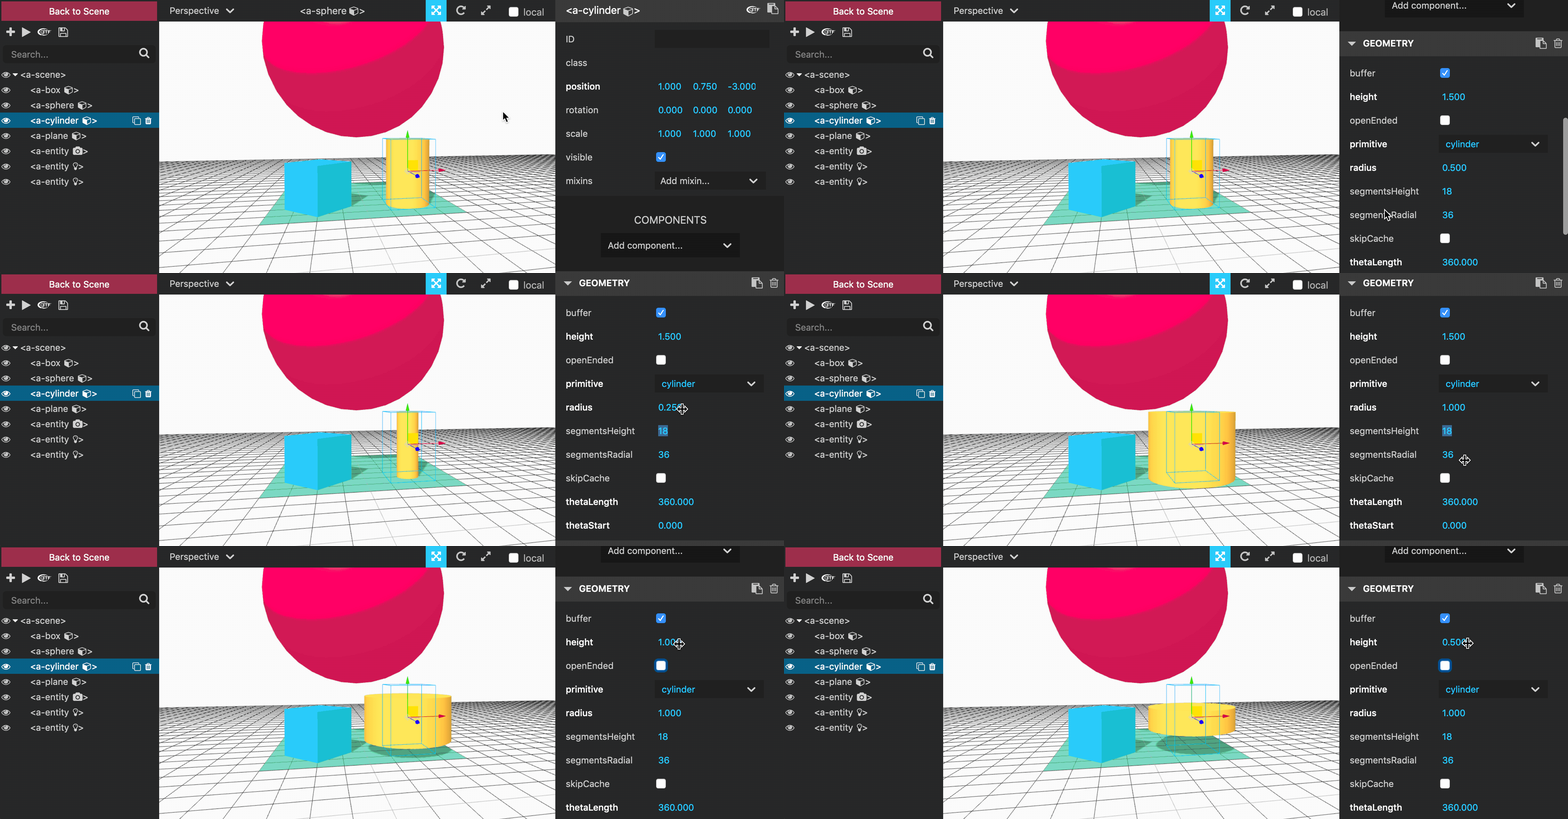
The different properties of shapes (like a cylinder’s radius or height) can be adjusted through the Inspector as well, as shown in the animation below:
Try adding some of the different shapes to your scene and see what happens when you change the different properties of the shapes (either through HTML or the Inspector).
If you add some shapes to your scene in HTML but you can’t see them in your scene, you may have to check where they are positioned with the Inspector. You can then reposition the shapes using the same steps for repositioning that you used in the last activity.
Build a Snowman
Now, you are going to use your knowledge of shapes in A-Frame to build a VR snowman.
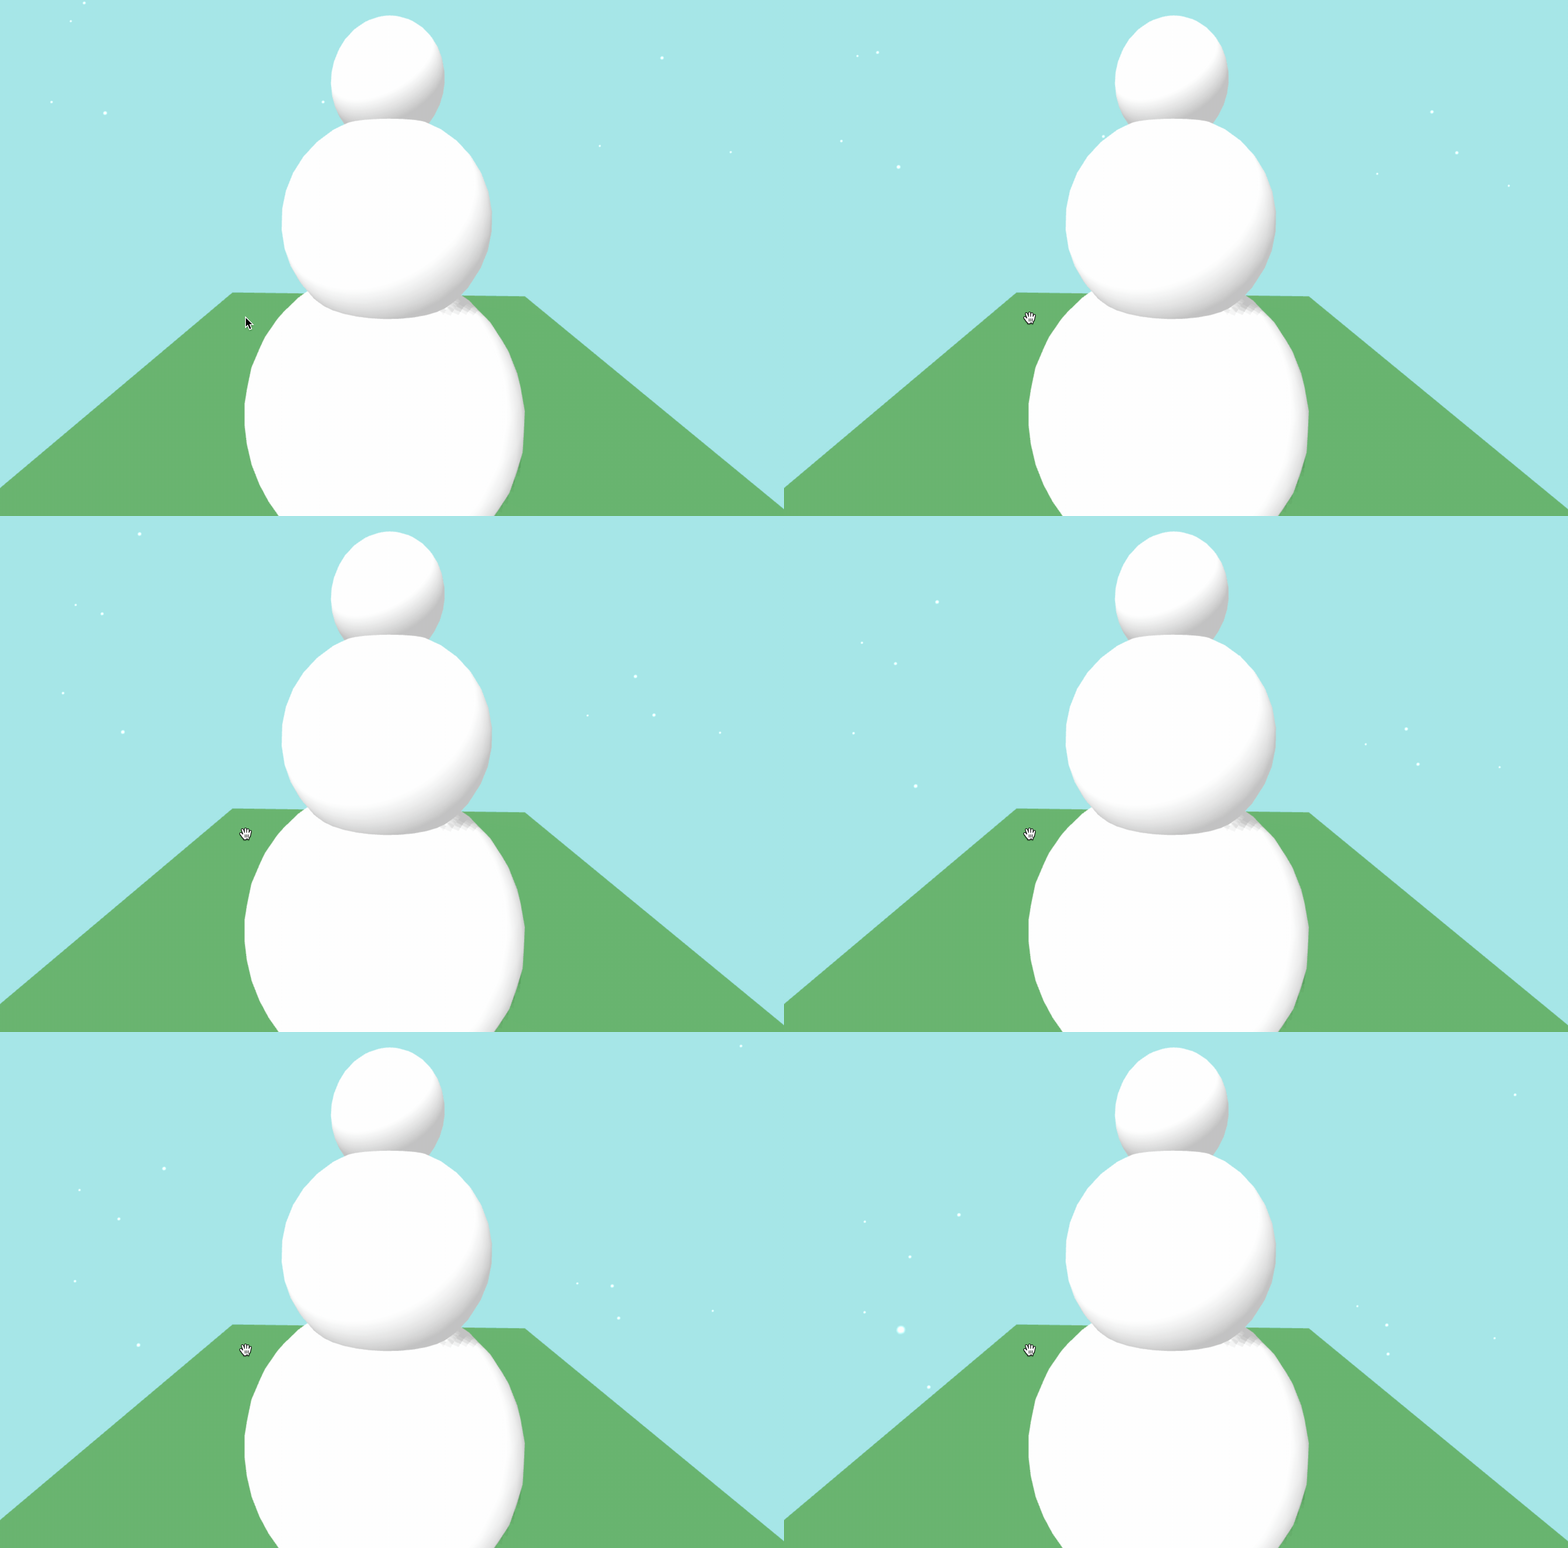
The end result will look something like the snowman in the image below:
To get started on this activity, you should first remix the Snowman Starter Project that we have created with Glitch.
You may want to have a look at the code that is in the original project before making any changes. You may notice that there is an animation of falling snow in the background of our scene. There are two lines in the project in the index.html webpage that make this animation happen.
This line below brings in some code from a component called aframe-particle-system-component:
<script src="https://unpkg.com/aframe-particle-system-component@1.0.11/dist/aframe-particle-system-component.min.js"></script>
A component is code that has someone else has written, which we can use to add more features to our A-Frame scene. If you would like to find out about more components, you can find a curated collection of components for A-Frame at the A-Frame Registry.
This line below adds a particle system (the falling snow) to our scene:
<a-entity position="0 2.25 -15" particle-system="preset: snow"></a-entity>
We have used the snow preset of the component for the starter project but there are few different presets to choose from. You could try changing the snow in the particle system’s <a-entity> tag to dust and rain and see what happens.
Once you have had a look at the code in the index.html page of the Snowman Starter Project, you can get stuck into building your snowman.
If you get stuck, you can use the following code snippet to add the base of your snowman to the scene.
The code below will add a white sphere with a radius of 0.6 to your scene, which you could use as the base of your snowman.
<a-sphere position="0 0.6 -3" radius="0.6" color="white" shadow></a-sphere>The snowman should be built by using three white spheres that get smaller in size as the snowman gets taller.
If you finish building your snowman quickly, you could use other shapes to add features (like eyes, a mouth or nose) to your snowman. For example, the snowman in the animation below has two eyes (two circle shapes), a mouth (a circle shape with thetaLength of 180) and a nose (a cone shape).

Add a Sign
In the last part of the activity, we have positioned shapes in the scene by using absolute positions that are specific points in the scene.
In this part of the activity we are going to create a sign for our snowman by grouping shapes together and using relative positioning. When we group together shapes and use relative positioning, it easy for us to put multiple groups of shapes (for example,the snowman that we just built) in different parts of our scene.
Copy and paste the snippet below into your Snowman project (remember that our A-Frame tags have to be inside of the <a-scene> and </a-scene> tags!)
<a-entity position="-0.5 0.25 -2">
    <a-box height="0.5" width="0.1" depth="0.05" position="0 0 -0.05" color="#784212" shadow></a-box>
    <a-box height="0.3" width="0.7" depth="0.05" position="0 0.1 0" shadow></a-box>
    <a-text value="3D Snowman" align="center" color="black" position="0 0.1 0.05" width="2"></a-text>
</a-entity>
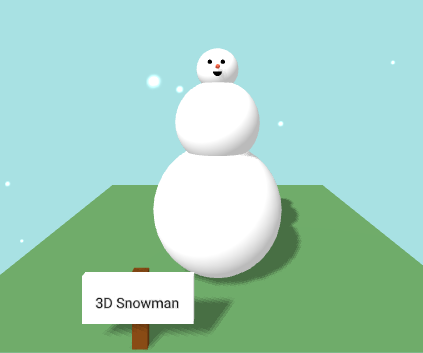
When you view your webpage, you should now see a sign for the snowman in the scene, as can be seen in the image below:
The positions used in the different shape tags are all relatively positioned with the parent entity. This means that we can easily copy the shapes and add them to another spot.
Let’s say that we want to have another sign to the right of our ‘3D Snowman’ sign that says ‘Built in A-Frame’. We can do this by copy/pasting the tags for the sign above and changing some of the properties in our HTML, as demonstrated in the animation below:
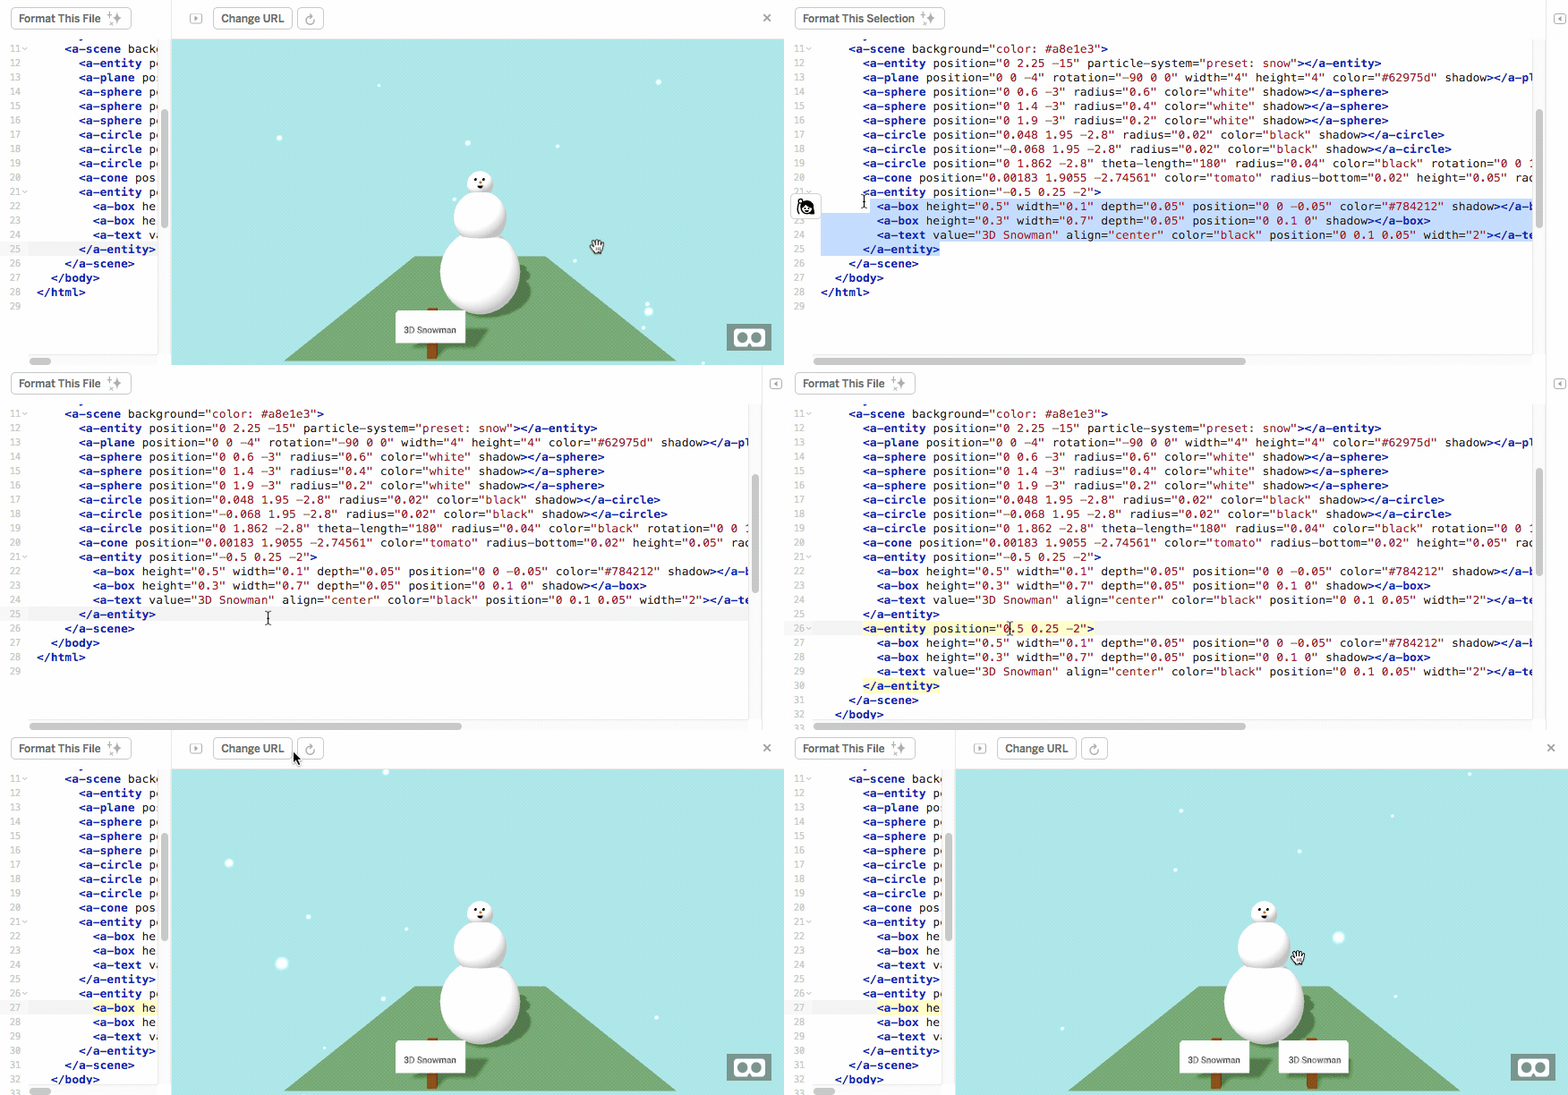
In the animation above, I:
- Copied the tags that created the ‘3D Snowman’ sign
- Pasted these tags after the closing <a-entity> tag in the index.html file
- Changed the x coordinate of the sign’s position so that it was 0.5 instead of -0.5
- Changed the value of the text so that the new sign now says ‘Built in A-Frame’ instead of ‘3D Snowman’
Note that I changed the setting that makes the webpage automatically refresh for the animation above, so these steps may work slightly different if you make similar changes to your project.
If the shapes were not grouped together and did not use relative positioning, we would have to adjust the positions of all of the entities (the two boxes and the text entity) rather than just the position of the parent entity.
In the animation above, we changed what the text in our scene said (the value property) but it is also possible to change other properties, including the color, size and font used for the text. You can find out more about how you can display text in A-Frame from the Text Component’s Documentation Page.
Challenges:
- Use different fonts for the sign (you can see details about the 'stock' fonts available in A-Frame on this page)
- Change the colour of the snow falling in the scene
- Change the colours of the boxes and text used for the sign
- Change the size of the signs
- Add more signs to your scene
- Change the snowman to be a group of shapes that are relatively positioned
- Add more snowmen to your scene
Nice work, you have completed the Positioning Shapes in A-Frame activity! In the next session you will learn about 3D images and models and how to include these in your A-Frame scenes.